| |
| Primary Role | Support, vehicle driver |
| Armor | Medium |
| Mobility | Walking only with normal jump and dodge roll, can improve travel speed with vehicles |
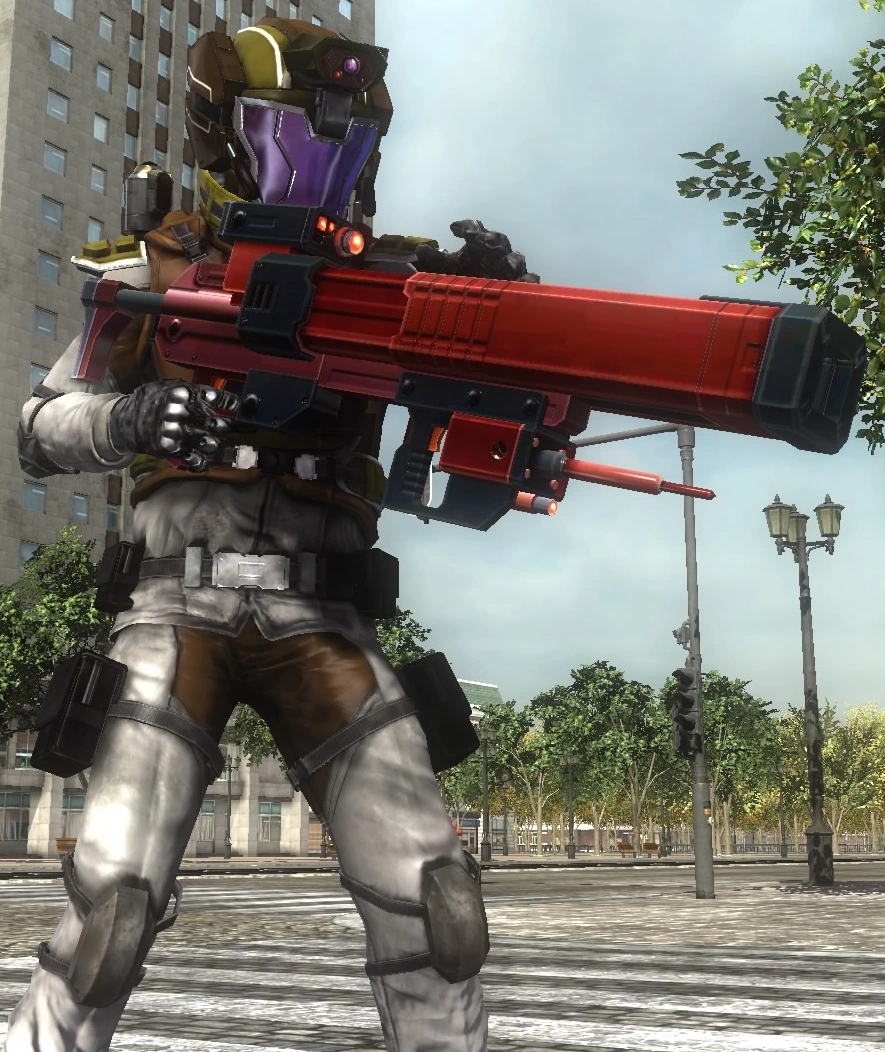
| Weapons | Limpet guns, support equipment |
| Special Attributes | Three weapon slots plus dedicated vehicle slot |
| Defensive Move | Roll |
For the Air Raider class from EDF 2025 and EDF 4.1, see Air Raider (2025). For the weirdo in a welding mask from Earth Defense Force 2: Invaders From Planet Space, see Air Raider (IfPS)
The Air Raider is the support class in Earth Defense Force 5. He starts the events of the game as a civilian technician certified to repair military machinery and with privileged access to military radio systems, but is quickly drafted into the EDF after the Sergeant concludes his increasingly futile attempts to get "the civilian" to safety.
Overview[]
Air Raiders are the battlefield logistical arm of the EDF forces, and are relied upon for precise tactical data and support for other EDF infantry. Oddly, though much focus is placed on them, no NPC Air Raiders are ever encountered.
The Air Raider is an oddity at first, seeming feeble with his fiddly, strange weapons and reliance on vehicles and strikes, but with a proper understanding of his various gizmos he is a powerful soldier even on his own, and can turn a struggling team into a wrecking ball.
While they can benefit all EDF troops, the Air Raider is a particularly strong ally for the Fencer, allowing the use of his most powerful missile weapons. He can no longer offer assistance to a Wing Diver as the Plasma Assist devices have been removed, most likely because it would be overly complicated to make them scale with her new upgradeable Plasma Core mechanics.
The Air Raider has three weapon slots, along with a fourth slot that is reserved for vehicles; he cannot place vehicles in his three normal weapon slots, or place weapons in his fourth. He has the same starting HP as the Ranger at 200, and the same armor growth at 0.64 HP per armor item, a significant increase over the previous game.
The Air Raider's role as a vehicle driver has been somewhat decreased since the previous game: now the only vehicles that require a Ranger or Air Raider as their driver are Armored Vehicle Grape, the BMX10 Proteus, all helicopters, the Free Bike, Depth Crawlers, Naegling Self-Propelled Missile Launchers and civilian light trucks. This also means an increased risk of other players making off with the Air Raider's vehicle in online play.
The EDF 5 Air Raider retains much of the class rebalancing from Invaders from Planet Space, including passing over the C Bombs and Impulse mines to the Ranger. In addition, the Ranger has now also taken some of the Air Raider's vehicles, specifically the Epsilon Armored Railgun, EF31 Nereid and HU04 Brute are now exclusive to the Ranger, as is the new EMC vehicle and the new Bike, not that the latter is exactly a tragic loss. He also now has the three IfPS weapon slots and a dedicated slot for vehicles, though again like the IfPS Air Raider, he has lost the ability to equip the same weapon multiple times: this ability is now exclusive to the Fencer class.
Unlike 2025 and 4.1 where he started with an E551 Gigantus, barring DLC the EDF 5 Air Raider class starts out with no default vehicles unlocked, though it only takes a short time playing with any class to unlock one. Instead, he has a wider selection of strikes and equipment.
The Air Raider is the class most affected by underground maps: like the Ranger he can only call for a few specific vehicles, and the Air Raider additionally cannot call in support strikes.
Key Mechanics[]
The Air Raider is probably the most complex class in terms of the number of distinct concepts the player has to understand to use them effectively.
Reload credits and timed reloads[]
At the heart of the Air Raider is the reload credit system, which is used to replenish some of his strikes and his vehicle requests. All such abilities require a set amount of credits, which are earned by defeating enemies. There is no numeric display of how many credits the Air Raider has or which enemies award what, but it does not take long to get a feel for it. Every enemy killed in a mission, be it by the Air Raider, other players, NPCs or scripted airstrikes, counts towards every Air Raider's reload credits; this even applies if he is downed in multiplayer. Every Air Raider earns the full credit allocation; there is no way for one Air Raider to reduce the allocation of another.
Credits are earned simultaneously for everything that uses the system; each one gets the full credit allocation, it is not divided among them and does not require the strike or vehicle to be equipped. If a strike or vehicle drop is already fully reloaded, any further credits earned while it is full are lost.
Once the full allocation of credits for something has been reached, the Air Raider will receive a notification with a speaker icon on-screen from whichever character is responsible for the particular thing that is ready.
New for EDF 5 is that some support strikes do not use this system: instead, they rely on a normal timed reload. This functions like a Wing Diver's reloading system in that the reload occurs regardless of whether or not the weapon is selected. The Gunship support strikes showcase this system most, with some having reloads so short that they can essentially be used as substitute firearms. The Air Raider's ZE-GUNs and some of his assist devices also function in this way, allowing him to focus more on managing threats than walking around holding a box while he waits for mysterious processes inside it to conclude themselves.
It should be noted that there is a timing difference between the two: a reload credit based strike cannot be deployed again until the effect of the previous use of the strike ends, but can earn reload credits again the instant it is initiated and the bar empties. A timer-based strike, on the other hand, will only start to reload when the effect of the previous strike concludes. This means in a target-rich environment (for example, Mission 37) it is possible for a reload credit strike to be ready faster than one that uses even the shortest timer.
On the other hand, if the beacon for a timed strike is somehow destroyed, it will continue firing while simultaneously starting its reload. This can result in having two of these strikes out at the same time: this is particularly common with the Autocannon / Minigun / Vulcan strikes when attacking Cosmonauts, as the beacon will be deleted if the strike destroys the piece of armor it is attached to.
The Air Raider receives a starting credit allocation that is enough for all strikes to be deployed for the first time the instant the mission begins. All of the Air Raider's vehicles begin a mission with their credits 50% filled.
Vehicle deployment[]
Summoning a vehicle once the player has enough credits is a matter of selecting it and throwing a smoke grenade to mark the desired drop location. A Transport Aircraft Noble will fly onto the map after a short time, hover briefly, and then release a large shipping container over the marker, which will break open and deploy the vehicle wherever it lands. The transport cannot be targeted by enemies and is invincible, so there is no risk of losing a vehicle drop by requesting it in a "hot" landing area.
Unlike in the previous game, the vehicle is not selectable in the normal weapon inventory, and it is not deployed using a normal grenade throw. Instead, pressing the bottom face button on the controller (Z on keyboard) when a vehicle is ready to deploy will trigger an animation where the Air Raider throws a grenade a short distance in front of himself. Unlike the previous game this is not a full grenade throw with a variable throw distance, but the player can control how far it goes to a limited extent by moving the camera position, as the grenade is thrown with a fixed amount of force at the middle of the screen. As with the Ranger's MG-series grenades, if the Air Raider is moving when he throws the grenade, its trajectory will be altered with respect to his motion.
Careful placement of the marker is important to avoid wasted credits. For example, if the marker is placed next to a building, it is quite likely the vehicle will end up on the roof. The game actively attempts to avoid this by having the container bounce once when it lands, but this can just result in the box breaking open in the air and the vehicle landing upside-down or sideways. If a vehicle is on a roof the best way to get it down is to destroy the building, though this requires the Air Raider to have a suitable weapon equipped. New for EDF 5 is that vehicles have a strong self-righting action and will often flip over of their own accord or when re-entered, even if completely upside-down. Walking vehicles are not subject to this and cannot fall over, they will just end up standing with one foot on thin air.
The dropship seems to use the same AI as Porters, and so in areas surrounded by skyscrapers may drop a vehicle in the middle of a road rather that at one side as requested.
The number of vehicles allowed in play at once is limited: each Air Raider can have three vehicles. Summoning a further vehicle will make the one that has been unoccupied the longest explode when the container for the new one opens.
Using a vehicle requires the character to step inside one of the one or more glowing blue circles around it and pressing the revive / enter vehicle button; if the vehicle has multiple positions, there will be multiple circles corresponding the the crew positions. If there is no circle, the vehicle is either occupied or the class being played as cannot get into any of the vehicle's available positions. While in a vehicle, any weapon reloads in progress are paused, though the Air Raider's reload credits accumulate as normal. A Wing Diver's energy will also regenerate as normal, and because the mechanics do not account for her unique off-hand reloading, the weapon she does not have selected will continue reloading normally if it is a reloading type. The crew of a vehicle retain their hitboxes while inside it even though there is no way for them to take damage; this means that Life-regenerating devices will heal their hitpoints and the vehicle's at the same time.
It is still possible to pick up Items in a vehicle: unlike the previous game, the pickup area is not limited to a small part of the vehicle and is instead defined by a large circle around it, as with a running Ranger. The exceptions to this are the BMX10 Proteus and Gigantic Unloader Barga, which cannot pick up items at all.
Vehicles can be healed by any life-replenishing device, but all vehicle weapons other than Barga's fists and feet have limited ammunition that cannot be replenished in the field. The only way to replenish ammunition for a vehicle is to summon a new one.
Enemies tend to ignore unoccupied vehicles, though they may attack them accidentally while trying to hit something else. In addition, Colonists and Cosmonauts may continue to attack an abandoned vehicle if it was previously occupied and they did not see the driver exit it. Occupied vehicles seem to have a slightly higher aggro priority than dismounted characters.
Target marking[]
The Air Raider has multiple methods at his disposal for designating targets, some for off-map artillery strikes while others allow designation of targets for other players using lock-on weapons. Strikes provide their own method of marking the target; either a smoke grenade in the same way as vehicle drops, a provided Laser Guide Kit (which does not function as a normal Laser Guide Kit and can only be used to direct that specific strike) or a special gun that launches a marker.
Prolonged strikes using the Guide Kit may require direction throughout their duration, or benefit from it; the Bulge Laser can be redirected at any time with the Guide Kit or left in place. Missile strikes will fire the missiles so they fly over the map at a fixed altitude and the Guide Kit is required to guide them down to the ground; if this is not done, the missiles will keep on flying straight out of the map and the strike will be wasted.
Outside of strikes are the normal guidance devices. The Air Raider's Laser Guide Kits and Guide Beacon Guns are far more than just pointers; they multiply the lock-on range and lock speed of any guided weapon, and can allow a normally multi-target weapon to lock all of its attacks onto a single target, allowing area suppression weapons to bring down powerful enemies they would otherwise barely scratch. The lock target from a Laser Guide Kit is not fixed and can be moved by the Air Raider at any time; any missiles already locked on to it will shift their target accordingly, which can allow for aim adjustments on a moving target or sweeping the aim of a group of missiles to hit multiple enemies. If the Air Raider ceases to aim the Guide Kit, any missiles locked on to it will act as if the lock target still exists for a brief period, then lose target and continue moving in whatever direction they are currently moving in, though this can result in them hitting the target anyway.
A Guide Kit or Guide Beacon is required to designate targets for certain powerful Fencer weapons, specifically Haytal Multiple Missiles and the Phoenix and Leviathan: without one, they cannot be fired at all.
Guide Beacon Guns can affix a lock-on designation Beacon to a fixed position or an enemy; they are perfectly accurate and like the Guide Kit are fitted with a zoom mode for precision targeting, and have a long range. Placed Beacons last forever if left to their own devices, even if the Air Raider who placed them is downed, though they will vanish if the thing they are affixed to is destroyed, lasting until a corpse or vehicle wreck is deleted by the game engine. At any time the Air Raider can reload the Beacon Gun, a five-second procedure, which will delete all currently placed Beacons. They offer an inferior boost to the Guide Kit and generate a target at a fixed point that will only move if the Beacon does, but have the advantage that the Air Raider can place multiple Guide Beacons at the same time (with all but one of them) and that they do no have to continue aiming to designate the target after the Beacons are placed. They also allow him to single-target his own multi-target guided weapons like the Naegling Self-Propelled Rocket Launcher. Guide Beacons can also be affixed to vehicles and player characters, enabling gleefully stupid plans involving, say, firing Leviathans at a hidden target using a Guide Beacon attached to a Wing Diver.
When a weapon is being guided or locking on, small squares will appear in the Air Raider's HUD: a red square indicates a lock-on weapon trying to acquire a target or a missile from a strike following a current aiming point, while a green square indicates a lock.
Assist devices, Decoys and generators[]
The Air Raider's arsenal of support equipment includes special deployable devices and guns that can heal, increase the defensive or offensive capabilities of allies, distract his foes and even generate forcefields that can block the shots and in some cases the movement of enemies.
An assist device will affect all player characters and friendly NPCs in its radius of effect. The life-recovering items also affect all enemies in their area of effect, but since the radius is small, this is very seldom a disadvantage in practice. Power assist devices will not affect the damage dealt by turrets, bombs or mines, or by any form of Air Raider strike. Guard assist devices will not affect the durability of Decoys, though Life Vendors will work on them. Neither device provides any kind of bonus to forcefields.
Assist devices have a fixed duration of effect, after which they will disappear. Their behavior during reloads has changed: now, reloading does delete placed devices rather than having them last until their duration expires, but on the plus side, reloading an assist device no longer requires it to be equipped.
The life devices, because their duration is noted in seconds, appear useless when their stat card is examined: what use, the starting player might ask, is a device that only regenerates 0.097 health per second? The answer is that this boost is provided not for each second but for each frame, and thus 60 times per second.
Power and Guard assist devices now show their effect as a percentage rather than a multiplier value. They do not stack their effects if several are placed, so there is no point in placing more than one in a specific area. If for some reason the Air Raider brings two Power or Guard devices with different multipliers, only the better multiplier is applied. Life recovery devices, on the other hand, do stack their effects. Overlapping forcefield generators will have to be penetrated one at a time.
The forcefield generators create glowing walls of various shapes that can absorb a set amount of damage. Allies can fire through the field (though their splash damage from explosive weapons will reduce its hitpoints, even the normally harmless splash damage weapons of NPCs), while it will block shots from enemies. It should be noted that the laser from a Guide Kit now can pass through a forcefield (unlike in 2025 and 4.1), though the device's description is still incorrect and it actually will stop enemy explosions from dealing splash damage though it, just not allied ones. The precise method of identifying the allegiance of an explosion is a closely guarded secret of the EDF.
Enemies cannot walk through most forcefields, though large physical attacks like charging Ants or a Deroy's lunging stab attack may pass through them. Unlike assist devices, generators will last until their hitpoints are exhausted and are not on a timer; however, they will all vanish if the system is reloaded.
Decoy devices seem to function by having a much higher targeting priority than NPCs or player characters. They work like a hybrid of an assist device and a forcefield, having their own hitpoints and a timer, but unlike assist devices will remain in effect even if they are reloaded. They take up an equipment slot with something that is not a weapon, but can be valuable if used correctly. Normal Decoys are placed and then activated manually, while the DLC "Pure Decoys" are fired from a modified Limpet Gun and can thus be placed at a distance; Pure Decoys have twice the duration of the longest-operating normal Decoy though only one-third the durability of the lowest-ranked normal one. It is more than a little amusing watching a Colonist attempting to target a Pure Decoy that is attached to its own elbow. It should, however, be noted that the aggro alterations to allow for "stealth" missions also reduce the distance at which enemies can aggro to a Decoy, making them somewhat less useful. In particular, one classic tactic of using a helicopter to place a Decoy on top of a Transport Ship to distract the enemies it spawns now seldom works.
Uniquely, Decoys will take damage from normal shots fired by NPC allies, though allies will not deliberately target them. Enemies with grapple attacks treat a Decoy like a vehicle, taking a fixed amount of damage per bite attack but not being picked up.
All devices will adhere to vehicles and travel with them. Forcefield generators seem to have lost much of their old tendency to fall off moving vehicles, and so are more effective when placed on them. Assist guns can also be fired directly at NPCs or player characters and will adhere to them, providing the boost for as long as they are active.
Limpet Gun functionality[]
For first-time players there is often some puzzlement as to why these weapons do not appear to do anything but attach flashing lights to enemies. The Limpet Guns fire one or more sticky projectiles that must be detonated manually using the alt-fire button; reloading them makes all currently planted projectiles disappear, and is intended as a safety measure if one of them has attached itself to something the Air Raider does not want to blow up for some reason.
Another point of note is that often only one explosive Limpet Gun projectile attached to a specific building or low-level enemy will actually detonate, as the game engine sometimes deletes all the others as the target switches from its normal model to its destroyed model. This is particularly common with small structures and high-level Limpet Guns.
Suppress Guns[]
The Suppress Gun replaces the Wireguns from the previous game, giving the Air Raider his only ordinary projectile weapon: this is functionally a shotgun with an extremely short effective range even when fully upgraded, after which the projectiles simply disappear. Since it is so lacking in range, it is no longer useful against flying enemies, and more suited to emergency defense, particularly freeing the Air Raider from the grasp of a Crimson Ant.
Rolling[]
The key to moving around quickly without a vehicle and avoiding enemy attacks is the dodge roll move, executed by pressing the jump button while moving left or right at any angle. This not only speeds the Air Raider up slightly, it also has the effect of flattening his hitbox, meaning many enemy attacks will pass harmlessly over him, and has some invincible frames. A rolling Air Raider is a much smaller target than a Fencer or Wing Diver.
Weapon Classes[]
Including his vehicles, the Air Raider has the most weapons of any incarnation of the class, with 301 excluding DLC and 333 including both paid DLC and the high-level unlocks from the two DLC mission packs.
Request Artillery Units[]
Strikes in the Artillery category consist of either the middle-of-the-road Mortar, an area-effect Howitzer or a more focused Cannon. All Artillery strikes are based on a Reload Credit requirement: the Mortars have the lowest, with Cannon about four times more costly and Howitzers the most expensive. All types of Artillery strike use a thrown smoke grenade as a marker for the midpoint of the strike area, making them a little imprecise: they also take a fair amount of time between being signalled and the rounds actually arriving in the target area, meaning some lead must be applied to moving targets.
These strikes will have two stats that define a radius: one is the overall effect area ("attack radius"), the other the effect area of each individual shot ("blast area"). The red marker that appears on the ground and in the minimap when the strike is deployed is the attack radius, and all shots fired will be randomized within this area. Just being outside the red area therefore does not necessarily mean the player character is safe, since a shot that lands at the very edge of the red area can have a blast that extends well outside it. For example, the Gigantic Howitzer's map marker is 160 metres in radius, but the 60 metre blast radius for each shot means in theory it could deal damage up to 220 metres from the location of the grenade marker.
Mortar strikes are very cheap and deal more damage per shot than the Howitzer, but have smaller splash and effect areas, sometimes missing targets in the marked strike zone entirely. Howitzer strikes deal fairly low damage with an enormous splash area (up to 60m per round) which means that any given target will tend to receive damage multiple times during the strike, and are best against groups of low-level enemies such as Ants and Spiders, while the Cannon strikes fire double the number of shots with less than half the splash radius, but can deal up to almost 60,000 damage per hit, more than enough to bring down a Colonist on Inferno. They are very well suited to killing boss-type giant insect enemies.
Request Gunships[]
The "Gunship" category of strikes from the unfeasibly heavily armed aircraft DE 202 include a broad range of strike options. All of them use a beacon gun marker and time-based reload: the reload will not start until the marker for the previous strike has been deleted by the game engine. This happens when the strike has concluded, but it will sometimes be deleted sooner: one example is if it is attached to a piece of a Cosmonaut's armor and that piece is destroyed during the strike.
Autocannon strikes, including the Minigun and Vulcan, fire a prolonged burst of gunfire onto a single target zone with a 10-18 meter radius depending on the variant. The fire from this strike can penetrate multiple enemies, but does not damage buildings. Per-shot damage is low, but the whole burst deals significant damage and the reload speed is extremely fast, less than 2 seconds when fully upgraded, allowing this to be used as a basic weapon for the Air Raider. If the marker is attached to an enemy, the burst will track it, making it well-suited to attacking highly mobile enemies: the flipside is that it will remain attached to the corpse of an enemy it kills and knock it around if it is small, potentially harming allies or the Air Raider himself. Targeting the ground will prevent the system tracking a specific target, but can be useful if the player intends for the strike to remain in place and suppress a particular area.
105mm Rapid-Fire Cannon strikes are similar to the Autocannon strikes, but fire a smaller number of high-powered shots. These function like rounds from an Epsilon, with both a piercing effect and the ablity to damage buildings. They affect an area around double the radius, but this plus their increased power comes at the cost of having about five times the reload time.
120mm Neutralize Cannon attacks are essentially a downward-aimed shotgun blast, firing all projectiles at the same time in a broad spread. The weapon lacks any piercing ability and cannot destroy buildings, meaning it is actually fairly safe to use it even to escape from being bitten as the enemy's body will usually stop the projectiles. Unlike the prior strikes which are all single-shot, the 120mm Neutralize Cannon has a "magazine" of 7-15 shots per reload. If the player desires, they can replenish this before it is fully depleted by hitting reload in the normal way.
Unfortunately, because the origin point of the strike is high in the air, it will be blocked if the player tries to use it under any overhead obstruction such as a Transport Ship, and the Mothership will block attacks from this weapon across more or less the entire map.
The 150mm Cannon fires extremely powerful single shots: as with the Neutralize cannon, these strikes have a "magazine" which ranges from 6 to 20 beacons per reload when fully upgraded. As in 2025, the 150mm Cannon claims to have no area of effect, but actually hits a small area surrounding the impact point, meaning it can damage multiple enemies. However, the weapon is primarily useful for dealing with high-HP point targets. Shots from the 150mm Cannon have piercing capabilities and can destroy buildings.
For the normal variants, the beacon will track a moving target until the shell is fired, after which, even though the beacon will visibly still move with the target, the shot will impact where the enemy was at the time of firing. This can cause it to miss agile enemies such as Spiders and Battle Drones.
The variants with Lapis in their name are slightly weakened and have a lengthened reload, but allow more shots per reload, have a higher rate of fire for the beacon gun, the interval between deploying the beacon and the shot being fired is shortened, and the velocity of the shell itself is increased. The triple and quad variants, meanwhile, fire multiple projectiles at once, at the cost of a longer reload, fewer beacons per "magazine," and decreased per-projectile damage.
The 180mm Cannon and 190mm Cannon are essentially an even more powerful 150mm Cannon shot, with a larger impact area and high damage, at the cost of a reload time that is roughly doubled.
Rocket Cannon strikes differ from the others in that they fire a high-explosive rocket rather than a gun round. As with the 120mm Neutralize Cannon, since they lack a piercing effect they will be blocked if the target is under a Teleportation Ship or the Mothership. Unlike the Neutralize Cannon, the Rocket Cannon is able to damage buildings. The level 108 T2HS Rocket Cannon introduced in DLC2 is an oddity in that it actually has identical stats to the existing level 86 T2 Rocket Cannon: the gimmick here is that the T2HS has the firing delay and landing speed of a Lapis-type 150mm Cannon strike.
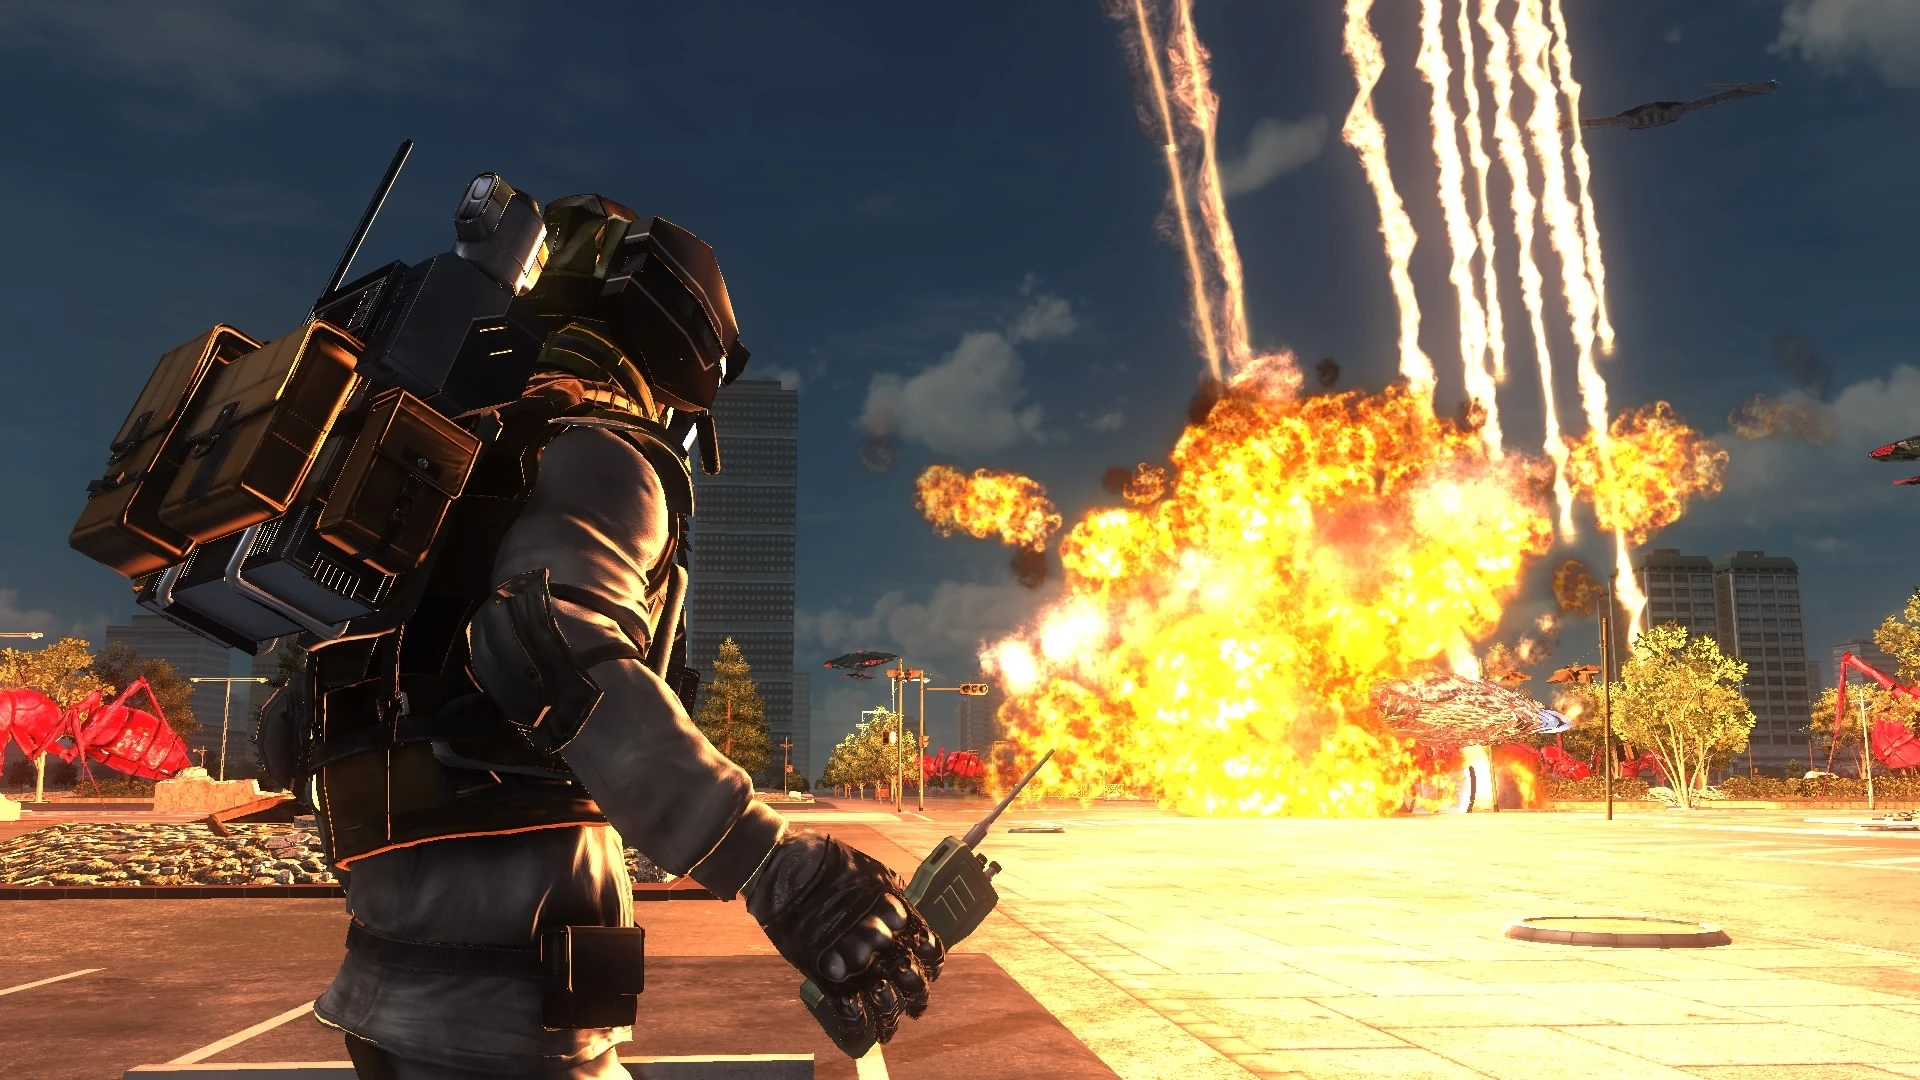
Request Bombers[]
Kamuy, the EDF's most powerful spelling error.
A broad selection of airstrikes carried out by one or more aircraft, with a strike for just about any conceivable situation. The attack itself can consist of explosive bombs, napalm, or strafing runs with piercing gunfire. Gun strikes do not deal friendly fire damage.
These strikes use a new placement method: rather than a grenade, pressing the trigger activates an aim mode where the camera detaches from the Air Raider and shifts to an isometric overhead view. The orientation of this overhead view is relative to the direction the Air Raider was facing when he initiated the strike. The player then controls either the midpoint or one end of the strike marker, moving it with the left analog stick while the right can be used to re-orient the strike marker around the point being moved. This means there are no longer any strikes that are specifically aimed across the map, as the player can do this with any strike they wish to. If the strike marker is controlled from one end, this is the direction the aircraft will come from, if not the marker's default position will have the aircraft coming in the direction the Air Raider is facing. The strike is called when the player releases the trigger: if they wish to cancel after bringing up the aim mode, they can switch weapons in the same manner as aborting a grenade throw.
With strikes that are the entire length of the map such as the first Phobos strike, they cannot be moved vertically in their starting orientation: to move them in this way, they have to be rotated first.
Airstrikes state their accuracy in terms of an "impact error" measured in meters: this defines the radius from the aim point (the dead-center of the marker line) in which a given projectile may land. This rating is similar to the concept of "circular error probable" (CEP) used as a measure of accuracy in real life, though in the game it is more "circular error absolute" since bombs will never exceed this radius. As a result, the straight line of the air strike marker is not a totally accurate reflection of where damage will be dealt: just being on the very edge of it will not necessary avoid damage from the strike: the marker actually indicates what the strike would look like if all projectiles impacted with zero deviation from the midline.
Of note is that enemies no longer aggro to bombers flying overhead, removing their functionality as a distraction in addition to a method of dealing damage.
Combat Bomber KM6 calls in one or more fighter-bombers to carry out a strafing run on the targeted area. Each gun run of the strike deals damage in an area 8 meters wide and the projectiles can penetrate multiple targets while descending (and sometimes even have a round damage the same target multiple times while passing through it), but do not damage structures.
High-Speed Bomber KM6 F offers further strafing run options: these offer less area coverage, but more focused damage, with individual shots more powerful than comparable level KM6 strikes in most cases. The principle advantage of KM6F is speed, however: they have a significantly lower reload credit requirement, and the aircraft itself arrives and completes its run extremely quickly.
Combat Bomber Kamuy offers a selection of fairly cheap single-plane strikes with high-explosive bombs, with good area coverage, high damage for their level and only a short wait between calling for the strike and the aircraft arriving.
Heavy Bomber Vesta calls in either one or two bombers to perform a napalm strike on the designated area. The napalm functions like other weapons of the type, creating an area of flames that lasts a significant time (a rather meagre 16 seconds for the first model, but 40-60 for later variants) and deals continuous damage to any enemy in contact with it. Also like these weapons, Vesta's napalm will stick to any surface it contacts: any bomb that strikes an enemy directly will ignite a fire on that enemy that moves around with it. This means it is generally best to aim Vesta's strikes ahead of enemies and force them to walk through it. The randomization of Vesta's bomb drops does, however, mean that it is rare for the flames to form a continuous wall, and a few enemies will often slip through gaps between patches of napalm.
The weapon description is a little misleading: Vesta's damage stat is the total damage an enemy would receive if it were in contact with one of the fires for its entire duration, and the per-hit damage and DPS are actually quite mediocre. Vesta also has the disadvantage that even if its reload credits fully refill, it cannot be called in again until the napalm from the previous strike burns out, leading to long downtimes with the longer-duration versions. It is most effective at dealing with Ants, and is even capable of stunlocking Gold Ants.
Heavy Bomber Phobos, which includes the Scout Bomber, is essentially a more powerful Kamuy, with a larger reload credit requirement to match, as well as a longer delay between calling in the strike and the bomber or bombers arriving. While it has a few single-plane strikes similar to Kamuy's (though vastly greater in effect), Phobos also has the multi-plane strikes of the old Charon Tactical Bomber with up to four planes, the old Wave Attack (now called Plan 10), and Bomber Midnight's Cluster Hit, with an even more powerful level 102 Cluster attack accessible in DLC 1. Phobos Z is the high-powered variant used for the final two non-DLC strikes, dropping bombs with high damage and greatly improved splash radius: the second strike is a fan-shaped four-bomber run where all four bombers will hit the initial aiming point with their first drop and the first few bombs deal overlapping damage.
Request Missiles[]
Missile strikes use a Guide Kit marker. For some reason, all missile strikes deal 100% friendly fire damage regardless of difficulty level: it is unclear if this is a bug or intentional, but it has not been patched out. This makes them exceptionally dangerous to NPCs.
There are two types of missile strike: the AH Cruise Missiles and Lionic Cruise Missiles on one side launched from DE 202 or Submarine Carrier Epimetheus, with the Tempest fired from Barren Land forming the other. Both types launch the ordered missile strike to fly over the targeted area; it must then be guided down to the ground using the Guide Kit, or the missiles will just keep flying horizontally until they exit the map. For most systems, especially Tempest, the time to guide the system is very long and makes these weapons tricky to use in combat without NPCs or other players to act as a distraction.
The first type is a volley of between 4 and 45 small missiles fired over a period of time. These can be guided to separate targets, allowing the strike to suppress a significant area. AH and N-Series missiles fire a small number of medium-sized missiles (4-6) that deal moderate damage, while Lionic strikes fire a much larger number of smaller missiles (20-45) for prolonged, lower-power bombardment. They reload over time, with the AH series taking a minimum of 40-60 seconds, while Lionic missiles take 92.3 when maxed out. The level 106 Lionic UA45XE, accessed by playing levels from DLC mission pack 1 on Inferno difficulty, is identical to the normal final version in terms of its displayed stats. Until the 1.6 patch for the PS4 version it was in fact literally exactly the same, but this patch fixed its functionality: the missiles from this variant travel much faster than usual, decreasing the time needed to guide them.
The second type is effectively a giant Air Tortoise, deploying a single vast, slow-moving missile with immense power and splash damage. It is excellent for attacking large groups of enemies that have not been aggro'd, though the sheer radius will mean the Air Raider draws a huge amount of aggro in the aftermath. Unfortunately, in the presence of the strengthened Spritefall and with the impossibility of one-shotting Cosmonauts due to their armor, the Tempest is highly situational. It uses reload credits, with all versions requiring a minimum of 3,691. The levels for Tempest are a little strange, with 40 levels between the Tempest A2 and Tempest A3, then three variants clustered within 15 levels of one another, the Tempest AT coming in just three levels after the A3 with over double the power when fully upgraded.
Request Satellites[]
Satellite strikes use a Guide Kit marker. Like missile strikes, satellite weapon strikes always deal 100% friendly fire damage regardless of difficulty level. There are three main strike types.
The Bulge Laser locks-on very quickly and fires a continuous beam of energy for around 30 seconds, then reloads on a timer of around 40 seconds depending on variant: this is a rather long time considering what the strike actually does. The stated damage is done 20 times per second, meaning it is quite powerful. If left alone it will simply fire constantly at its initially-marked location, which can be very useful for targeting a Teleport Anchor as it allows the Air Raider to deal constant damage while still being free to move around or get in a vehicle. If the Air Raider desires, the beam can be repositioned using the Guide Kit; it takes a short time to move to a new location, and some care must be taken to not accidentally move it to the Air Raider's own position. The beam only hits targets it physically contacts, and comes down at a slight diagonal, though this only really effects plans involving shooting a target in mid-air with it. It also has very silly effects on Deroys.
A stand-out is Mode S, the level 45 variant. This version has a extremely long reload time of over 90 seconds, with the trade-off being a hugely increased number of "shots" fired: the upshot of this is that it fires continuously for 80 seconds. While it is slow to deal damage, the total damage of the full beam is only exceeded by the final level 90 Bulge Laser variant.
Spritefall is an area-effect weapon. The marked location is used as the midpoint, with 60-120 shots being fired into the area around it; these deal substantial damage and have a good splash radius. Like the Bulge Laser, all Spritefall weapons have a very fast initial lock-on: in Spritefall's case, though, the target area is fixed once it is marked and cannot be moved around while the weapon is firing. Also unlike the Bulge Laser, Spritefall uses reload credits, and is moderately expensive. Spritefall shots will pass through multiple targets on their way to the ground, and can even destroy the cannons on the underside of the Outpost Base after passing through the hull.
Spritefall A to C are simply linear upgrades, though due to improved effect radius Spritefall C becomes slightly less focused. The high-end variants, however, each have their own quirks which mean they are suited to specific scenarios. Spritefall R has a slight per-shot damage downgrade from C but a 50% increase in shots fired, Spritefall Power Mode the highest damage, both per-shot and for the whole attack, but a slightly decreased shot count, Spritefall Maximum is a slight downgrade in stat terms (including firing only 60 shots, resulting in it only doing slightly more damage overall than Spritefall C) with the main benefit being a boosted rate of fire for the beams, and Spritefall Destroy has mediocre per-shot power but fires 160 shots, making it the second most damaging strike and allowing it to block off an area for a significant amount of time. Later variants do tend to have effect areas too large to reliably destroy point targets like Teleport Anchors on higher difficulties: some of the high-end versions can kill a Big Anchor up to Hardest, but no variant is powerful enough to reliably pull this off on Inferno.
Spritefall Shooting Mode β is an oddity similar to DE 202's 150mm cannon: it features a ridiculously low reload credit requirement which can go right down to just 77 credits (a single Black Ant being worth 60) and fires a single high-power Spritefall beam with a fairly significant area of effect. Since the beam comes straight down rather than at an angle like the Bulge Laser, Spritefall β is particularly effective against targets that tend to stack vertically, particularly Type 2 Drones. There is a slight delay between locking and firing on all but the final model: with this variant, since the lock-on time is extremely short it is quite tricky to avoid accidentally firing it twice in a row if it kills its target with the first shot.
Limpet Guns[]
Limpet Guns are the Air Raider's main type of personal firearm. They are a strange launcher that fires a number of small bombs that stick to targets. As noted, they must be detonated with the alt-fire key; reloading disarms all currently placed shots. The basic Limpet Gun can fire a handful of shots before needing to detonate or reload, while the rapid-fire Limpet Chain Gun can fire up to 36 smaller bombs in quick succession to suppress groups.
The Limpet Splendor guns function differently, firing canisters that detonate in a spray of lethal flechettes that rebound off surfaces; it should be noted these can still damage the Air Raider himself. The basic models have the highest count of projectiles placeable at once of the Limpet Guns, all with at least ten and the later variants (previously called Splendor Chain Gun, but now not having a special name) able to lay down 23 canisters per magazine. The Buster Bomb is an exception: it can only fire a few rounds, but each shot is actually up to 15 individual canisters, functioning like a shotgun, and each of those then release their own flechette burst when they are detonated, generating up to 120 flechettes per shot. The Detector models also do this, with the additional change of having a proximity fuze that will automatically detonate them. The fuzing on this is a little more finicky than an Impulse mine, however, requiring the target to stand directly over the centre of the canister to set it off. They can, however, be very effective if they are placed on the front of a vehicle. The Splendor guns are one of the Air Raider's best tools in underground missions, saturating whole rooms with lethal bouncing projectiles.
Limpet Snipers are a long-ranged variant firing 2-5 very powerful explosive charges, but have a slow rate of fire. They are limited somewhat by using the alt-fire button as a detonator, which means they do not have any kind of zoom mode. Their blast range is too small for them to damage structures, and they cannot deal friendly fire damage to the Air Raider himself, though in spite of the description saying otherwise, they can still damage NPCs.
Stationary Weapons[]
This category includes all of the Air Raider's placed weaponry such as sentry guns, as well as a few very odd weapons that are not, in fact, stationary at all.
The ZE-GUN series are automated sentry guns which will target enemies within their search range and engage them with machine-gun fire. The ZE Sniper variant fires far more slowly, but features improved search range and increased per-shot damage, at a cost of only having 20 shots: sadly, the weapon is a level 19 one-off, and so becomes irrelevant at higher difficulties. The ZE-GUN 10 is a special variant which allows the placement of up to 12 guns at once; though these do more damage per shot than the final ZEXR-GUN, each individual gun only has 100 rounds, and they have half the search distance of most models, the same as the default level 0 ZE-GUN.
They are placed with the fire button and activated with the alt-fire button, meaning they can be placed in advance as part of any number of dastardly plans. Increasing models of the normal ZE-GUN have a higher rate of fire, greater damage and more ammunition, and also have a faster traverse speed which means the final models more or less snap from enemy to enemy. ZE-GUNs can be placed on vehicles to improve their anti-bug capabilities, though care must be taken since while ZE-GUNs no longer deal friendly fire damage to occupied vehicles, they will still quite happily chew through unoccupied ones. The Achilles' heel of the system is the reload time, which can be up to 60 seconds for an un-upgraded weapon: reloading early will immediately delete all guns currently placed. As previously mentioned, this is now mitigated somewhat since the Air Raider does not need to hold a ZE-GUN to reload it. They also have limited elevation, making them less useful against aerial foes.
The ZE Launcher is a subtype of ZE-GUN that fires powerful explosive rockets instead of bullets. It is a lot more powerful, but also a lot more dangerous to the Air Raider, his allies and his vehicles, and so must be placed carefully. It also has much more limited ammunition, the first having just 20 rounds like the ZE Sniper and the second still only 40. The first model was originally the reward for completing all missions on Normal in 2017 as Storm 1.
The FZ-GUN is a new variant for EDF 5 that replaces the projectile-firing gun with a powerful but short-ranged flamethrower. All FZ-GUNs except the first DLC variant come with friendly fire fully enabled, even to the Air Raider who set them, making them more hazardous than the gun versions.
There is only one model of ZE Blaster, a level 111 weapon only unlockable in DLC mission pack 2. It could be thought of as a high-tech finale to the FZ-GUN line, replacing the flamethrower with a powerful continuous-beam laser with improved range and a penetrating effect to make it just as well-suited to crowd control.
The Robot Bomb is one of a series of exploding Roombas the Air Raider can access. That is not a joke, these weapons are actually referred to as Roombas in the game files. The Robot Bomb models will behave like an actual Roomba, proceeding forwards until they encounter an obstacle and then trying to move around it. Unlike the previous game where they were free-running and manually detonated, they are now a lock-on weapon and detonate automatically upon reaching their target, making them far more effective. They are about as powerful as the Ranger's mid-level hand grenades, have a large blast area and up to seven can be placed at once with a fast reload.
The Patroller is a second form of exploding Roomba ("sentences you never thought you would assemble" no. 362) that will seek out enemies if it passes within a short distance of them and explode automatically, dealing damage like a landmine rather than a bomb. They can actually be quite useful in underground missions, though they cut into the Air Raider's ability to carry sensible weaponry. On that subject, the middle version, the Speed Star, is purely for fun since it cannot explode and is notable for travelling at 200 kph, actually slightly outpacing the top-level Free Bike.
The Assault Beetle continues the theme of stationary weapons that are neither stationary or weapons; it is a mobile toy beetle stuffed full of explosives that can be detonated manually, and will stick to enemies if it encounters them. It will only stick to mobile enemies. The last model, the Stag Beetle, rises vertically; it is unfathomably difficult to use effectively, but actually deals quite a lot of damage. When fully upgraded the Air Raider can deploy up to 40 (!) Stag Beetles at the same time.
Support Equipment[]
This category includes the two laser guidance systems and the "assist devices." There are two types for the latter: guns and posts / vendors. Posts are placed on the ground straight down from where the Air Raider is holding them, between his feet, while guns fire a small post that will adhere to anything it contacts. Both types will attach to vehicles, while the mini-posts from guns will also adhere to scenery, NPCs and player characters, enemies, etc.
All such devices are defined by their magnification / recovery amount (the latter for life-restoring devices), duration and area of effect. All posts have fairly long reload times (a minimum of 22.1 seconds even when fully upgraded) while guns usually reload more quickly but have shorter duration, though some have greater effects to compensate. No device that restores life can be reloaded.
The Laser Guide Kit is the basic pointer-type guidance system. They are always equipped with a zoom function, and as they increase in level their multipliers to lock distance and lock speed increase in power. A unique variant is the High Speed Laser Guide Kit, which has an extremely short effective range but the best boost to lock-on distance of any guidance system and the second-best bonus to lock speed, despite being only level 6. This version seems to be designed for an Air Raider on the frontlines to act as a spotter for a distant Fencer.
Guide Beacon Guns, as noted, offer an inferior effect but the ability to place several at a time (usually) and no need for the Air Raider to keep pointing at the target to maintain the lock. The exception to placing several at a time is the Power Beacon Gun, which only allows the placement of one, with the tradeoff being that it is by far the strongest type.
The Life Vendor is the Air Raider's default assist device, a post-type device which dispenses health at a set rate and has no ability to differentiate friend or foe, though the small radius of effect means that if any enemy is in a position to benefit from the Vendor, several other things have already gone wrong. All models have a small radius and are effective for 60 seconds after being placed, with the number of posts ranging from 3 to 5 depending on model when fully upgraded.
The Life Spout Gun is the long-range version. Posts fired by a Life Spout Gun have almost ten times the healing rate of the equivalent level Vendor, but only last for ten seconds and like all gun-fired posts have a radius of effect of just 4.8 metres when fully upgraded, making it unlikely that as many characters will be healed by them; they are more suited to focused emergency healing of a single character rather than a group. The number of shots increases with high-level models, from 5 when fully upgraded for the first model to 10 for the last.
Power Posts magnify outgoing damage from other player characters, vehicles and friendly NPCs. Up to three can be placed at a time, though since their effects do not stack it is better to regard this as one post that lasts three times as long in most situations. The posts include one unique variant, Offensive Territory, which gives a moderate boost over a much wider area. All can have their reload time bought down to a minimum of 22.1 seconds.
Power Assist Guns have the same placement limits, but only give a mediocre boost, compensated for with a fast reload for an assist device (from a minimum of 5.5 seconds for the first, to as low as 2.8 for the final model).
The Guard Post is the inverse of the Power Post, decreasing incoming damage rather than boosting outgoing damage. The two variant types are the Zone Protectors, which like Offensive Territory have a mediocre boost but a larger area of effect. Guard Posts have the longest "up time" of any assist device at 120 seconds. All have a minimum reload time of 22.1 seconds.
The Guard Assist Guns feature a boost almost the same as the nearest normal Guard Post and a generous effect time of 60-90 seconds, making them very useful for protecting a specific character. They have the same faster reload times as the Power Assist Guns.
Special[]
The "Special" category includes a variety of things that do not fit into the other categories, though given precedent they could probably all be in the "stationary" category and nobody would bat an eye.
The Bunkers are a series of portable forcefield generators which create translucent walls in various shapes and sizes. Later models are immensely tough and block enemy movement, and they can be very useful for shutting off tunnels providing enemies are prevented from crawling around the top of them. They are extremely effective if combined with indestructible scenery to protect from above.
As noted above, they now adhere to vehicles much more consistently than in 4.1, to the point it is even possible to mount them on the rotors of a helicopter without them falling off. They will, however, remain in the orientation they were originally placed in regardless of how the vehicle moves around under them (ie, a field placed facing "east" on the map on a vehicle facing north will still point east even if the vehicle turns to face west), so it can be necessary to place several for consistent coverage from all angles.
They also include the remarkably poorly-translated "Elerctormagnetic Prison."
There are two types of Decoy available to the Air Raider. The basic Decoy is a modified hand grenade thrown as normal, while the DLC Pure Decoy Launchers are fired from a modified Limpet Gun and can therefore be set at range. The basic Decoy is manually activated with the alt-fire button, while a Pure Decoy deploys automatically on impact. Both types have enormously long reloads, but allow multiple decoys to be installed at a time. All Decoys except the last model take a minimum of 29.4 seconds to reload, while the final one takes 44.1 seconds: it compensates for this by being four times tougher than the previous model. Pure Decoys all take a fixed 30 seconds.
The previous Wiregun weapons have been removed and replaced with the new Suppress Gun weapon group. These are the Air Raider's only conventional bullet-firing handheld weapon, and function like the Ranger's shotguns, including having a piercing ability (in the Suppress Guns' case, for their full range) and damage falloff at range down to 10% of their full power. However, they have extremely poor range, with the lower variants maxing out at 18 meters and even the best only having 36. In spite of this they are actually quite powerful at point-blank range, with the final Suppress Gun MH2 doing an extremely respectable 15,402 damage per shot at this range when maxed out. Most are single-shot, though the pair of variants with "2" in their name have two-round magazines. Most have a minimum reload time of 3 seconds. They are best thought of as an emergency weapon for dealing with a sudden attack at close range or freeing the Air Raider from a Crimson Ant.
Vehicles[]
All vehicle requests use the reload credit system.
Tanks[]
The Blacker is the signature tank for the Air Raider, but since it lacks a secondary weapon it is actually more like a self-propelled gun. It is a single-seat vehicle and is fast, powerful and has heavy armor, but ammunition is limited. Its main gun elevation is improved over the previous E551 Gigantus, but still a little limited.
Like the Gigantus, the Blacker has a standard series with shorter-ranged cannons, and a series, in this case mostly referred to with the letters SP, which have a "long-range howitzer" weapon which has a flatter trajectory and a faster projectile, but greater recoil. New to EDF 5 are the Epsilon-like A series, which mount a piercing "Smooth-Bore Cannon" weapon with no explosive effect.
The B651 Titan is a gigantic 3-seat tank, 25 metres long and armed with a battleship-grade main gun, a very powerful hull machine gun, and two sub-turrets with launchers as a secondary weapon. It is by far the slowest of the Air Raider's conventional vehicles, but also one of the most durable and powerful vehicles in the game. The Titan's main Requiem Cannon is now roughly halved in power, but the muzzle velocity and trajectory have been hugely improved to compensate, with the weapon now behaving much more like a regular tank cannon.
Ground Vehicles[]
This category includes all of the Air Raider's other wheeled and tracked vehicles that are not tanks.
Armored Vehicle Grape is a wheeled infantry fighting vehicle with lighter armor than the tanks, but much greater speed. It is armed with a reasonably powerful gun in a limited-traverse turret, and can carry up to four crew, though the three additional positions are just seats in the back of the vehicle and characters in them cannot do anything but ride along. The weapon is either a rapid-fire "howitzer" which fires explosive projectiles with a small splash radius, or a "smooth-bore gun" which fires even faster and has a piercing effect to its projectiles. It is a little tricky to handle due to having overly realistic 8-wheel steering, and has a nasty tendency to roll. It has been improved from its prior incarnation with slightly better steering, an even greater reduction in recoil, and a turret capable of greater gun elevation along with about 270 degrees of traverse instead of a mere 60 or so. As a payoff, though, they do slightly less damage with their weapons.
DLC 2 adds a final special variant, the level 108 Armored Vehicle Grape SRXE. The SRXE has a unique armament: rather than a smooth-bore gun or howitzer, it is armed with a shotgun. This weapon fires spreads of ten pellets with a full-range penetration effect, each pull of the trigger firing a five-round burst.
The now more accurately named Naegling Self-Propelled Missile Launcher is a single-seat multiple-launch guided missile launcher and the closest thing the Air Raider has to a controllable artillery piece, able to lock on to up to ten targets. It is powerful against distant swarms, but has very weak armor. It is if anything even more top-heavy than in the previous game, and very prone to tipping on uneven ground, particularly if the launcher is turned to the vehicle's side. The only other real change from 4.1 is that a Naegling will no longer cut short a missile volley if the Air Raider gets out while it is firing.
The now correctly-translated Caliban Support Vehicle is a fast and incredibly tough mobile field hospital with four seats, which can replenish the health of characters who sit in the rear compartment. It is the only health-restoring system in the game which can be reloaded, and while situational, can make the difference between victory and defeat if employed well. Since NPCs cannot enter player-controlled vehicles, it is only useful for healing the Air Raider himself in singleplayer.
Helicopters[]
Helicopters feature extremely strange handling. Rather than having buttons to alter height up and down like most videogames, there is no button to descend, and the ascend button functions by spinning up the rotors so that they generate lift, which gradually decreases if the ascend button is left alone as if the rotors are some kind of flywheel. The helicopter will only start to descend once the rotors have slowed down enough.
It is probably better to imagine them as hot-air balloons with the ascend button the equivalent of using the burner; even if the burner is off, the balloon will not descend by itself until the air in it has cooled down.
Helicopters are the only vehicles other than the Free Bike which are damaged by contact with scenery; this includes their rotors. Small scenery objects will cause minor damage to a helicopter as the rotors spin up, while having it wedged against the side of a building can prevent the rotors from turning at all. Therefore, it is necessary to request and land helicopters in clear spaces to avoid wasted credits or needless damage.
Exiting a helicopter in mid-air is possible since there is no such thing as fall damage: however, there now is for the helicopter itself, and doing so will cause it to take damage on landing. It is briefly possible to get back into the helicopter after exiting it since the circle is quite large: this is no longer particularly useful, however, since burst-cancelling by exiting vehicles has been removed. It is also possible to get into the secondary seats of an HU04 Brute while it is still airborne, though barring very bizarre actions by one or more players this is only really practical for a Wing Diver.
Helicopters are also one of the two vehicles to now have limited fuel. This will only really become relevant if the player is attempting extremely cheesy tactics such as beating up Spiders by throwing ZE-GUNs off the wing of a hovering Brute at the top of the skybox, as the fuel limit is so high that a helicopter being used normally will almost certainly run out of ammunition before it becomes an issue.
If the player can get used to their odd handling they can be extremely powerful.
Since the HU04 Brute and EF31 Nereid have both been moved to the Ranger, the Air Raider's only helicopter is the replacement for the EF24 Bazelart, the N9 Eros. This is the "fighter" of the helicopters, being fairly agile and designed mostly for attacking with direct-fire guns. The basic variants are typically armed with a pair of short-ranged armor-piercing machine guns while those with Vulture in the name have long-ranged, perfectly accurate laser cannons that fire in five-round bursts. Secondary armament is either guided missiles that can lock on to up to eight targets at a time, or a "napalm cannon" that fires a shotgun-like spread of six incendiary projectiles that ignite on contact and burn for some time, dealing damage over time to enemies. All Eros variants have double the armor of the equivalent Bazelart variant.
Powered Exoskeletons[]
This category exclusively consists of Nix variants, despite the Nix not actually being an exoskeleton. The Nix is similar to the BM03 Vegalta from the previous games in terms of armament, but is significantly tougher, with final-level variants having five or more times more health than the equivalent Vegalta variant.
Special Weapons[]
An additional category of "none of the above" special vehicles.
The Depth Crawler, while just as jittery and allergic to the camera as ever, has seen a significant improvement: all variants are now four times tougher than in EDF 4.1, and so it is significantly less likely that a high-level Air Raider will be getting into a vehicle with lower HP than he has himself.
The BMX10 Proteus is also found in this category now, and is largely the same as it was before, a four-man walking machine armed with powerful weapons, but all but useless outside co-op play due to the lack of a driver's weapon. While it is largely unchanged from the previous game (save that it now shifts to combat position if any of its seats are occupied rather than only the driver's seat), it has the problem of being distinctly less impressive thanks to the buffs given to the Nix series compared to the Vegaltas.
Gigantic Unloader Barga unlocks at a fairly high level and is essentially a slightly reworked Walking Fortress Balam, though unlike Balam there are no armed variants of Barga.
Trivia[]
- When using in-game chat commands, any voiced character speech will be randomly chosen from lines recorded by Matt Nipperess (who is also the Grim Reaper Captain, EDF Chief Commander and DE 202's pilot) or Russell Wait (who also voices HQ and Bomber Phobos).
- A surprisingly large number of strikes have two sets of voice barks, one for when the Air Raider is a civilian and one for after he is recruited. Only a few, such as strikes from Barren Land, do not.